


Double Exposure
- Luke Kandiah
- Nov 30, 2024
- 3 min read
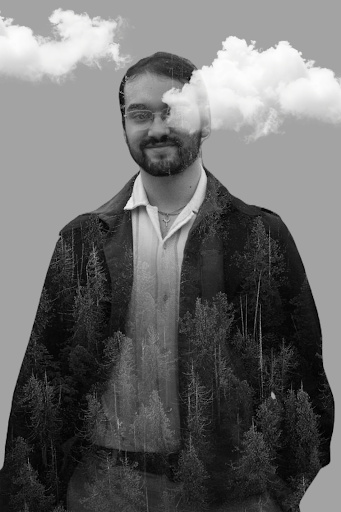
Double exposure is a photography technique that merges two images into one, creating captivating and surreal compositions. Although historically this was done using negatives in the darkroom, it's aesthetic can be reproduced in the art classroom using Adobe photoshop, or more accessibly Pixlr Editor.
It’s a perfect blend of art and technology that sparks creativity, making it an ideal project for students in Years 9–11.
This lesson plan will show how you can introduce your students to double exposure, breaking it down into simple, manageable steps. The focus is on an easy-to-follow process that encourages experimentation after an introductory lesson that is more didactic. Students will learn to layer images, adjust blending modes, and fine-tune their compositions, gaining both artistic and technical skills in the process.
Let’s dive into how you can make this engaging visual art technique a rewarding part of your classroom experience.
Important note about software:
Pixlr is a free, no-login-required photo editing software that is available online. In some ways it is easier to use than photoshop also.
If you are using Pixlr, as the steps below will follow, then use Pixlr Editor NOT Pixlr Express. Although you can only export 3 png files a day using this software, this is more than enough for an educational setting and its worth using for its more advanced functions.
I would suggest offering students a link to the webpage directly so that students do not make this simple error: https://pixlr.com/editor/
Alternatively, these steps can be easily reproduced on Photoshop, although the 'remove background' step will need to be done manually as it may not have this AI feature. In this case, use the magic-wand tool to select areas and delete them to make these areas transparent.
Suggested Prep:
I asked my students to prepare themselves for this lesson by bringing with them a selfie that they would be happy editing in the lesson. This makes it more relatable and students are invested immediately in the process. However, as not all students will always complete this prep, I would give students the option at the start of the lesson to choose between using their own selfie and using the image of a celebrity online.
Celebrity images are used to avoid students using photos of each other etc, but also so that high-quality images can be easily sourced. (on Google you can search for 'celebrity headshot' or
Sequencing
For my students, they completed a research page on Jerry Uelsmann over two lessons before engaging with Double-exposure directly. This sequenced as follows:
Lesson 1 - Research Page writing, using Describe, Interpret, Analyse, Judge.
Lesson 2 - Research Page artist copy, creating drawings inspired by the artist.
Lesson 3 - Double exposure lesson one, teaching to the top explaining the process of level 1 and assisting students to get to level 3.
Lesson 4 - Double exposure lesson two, Supporting all students complete level 2, challenging proficient students to repeat the process and learning adventurously; independently discovering the capabilities of the software to achieve unique results.
Starter Activity: Discussions About Application
The uses of Double exposure photography
Creative Worlds with Jerry Uelsmann

Showing our identity - Who we are, what we are connected to
Association & empathy - Encouraging connection between disparate ideas

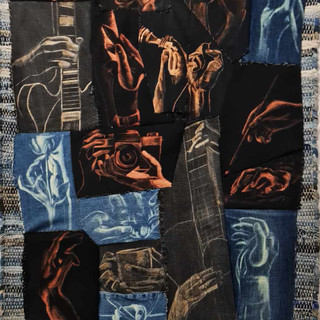
Finnish Artist Christoffer Relander makes surreal double exposure images in his project ‘We Are Nature’, to remind us that we are a part of the nature of the world and we should re-learn to respect it and take care of it.
Main Activity
Video Tutorial:
Printable Handouts:
'Level One'. - Overlaying and adjusting transparency https://docs.google.com/document/d/1e3eZb3M_gJ6SpfIQLufotb5xljbIQfxqChY2KHYjsqA/edit?usp=sharing
'Level Two'. - Blend Modes and double exposure
'Level Three'. - Adding extra elements!
For Level 3, encourage students to explore the software on their own!
Some pointers for independent students:
Choose a Compelling Background
Start with a striking background image. To simplify busy scenes, apply a Gaussian Blur to soften details or use an adjustment layer to reduce its contrast. These steps help bring focus to the subject and maintain balance in the composition.
Incorporate Unique Elements
Add creative overlays like clouds, smoke, fire, or other textures. Suggest searching for elements like “Clouds on black background” to find ready-to-use assets.
Copy and paste the element into a new layer. Use the ‘Screen’ blend mode to seamlessly integrate the textures, preserving their transparency and avoiding hard edges around intricate shapes.
Experiment with Colour and Mood
Encourage students to play with hue/saturation adjustments or gradient maps to unify the colour palette. This step can dramatically transform the mood of the final image.


Comments